
Trim your own Regency Bonnet
So many styles of Regency Bonnet to choose from!
Flowers are very much worn, and fruit is still more the thing. Elizabeth has a bunch of strawberries, and I have seen grapes, cherries, plums, and apricots. There are likewise almonds and raisins, French plums, and tamarinds at the grocers', but I have never seen any of them in hats... Elizabeth has given me a hat, and it is not only a pretty hat, but a pretty style of hat too. It is something like Eliza's, only, instead of being all straw, half of it is narrow purple ribbon. I flatter myself, however, that you can understand very little of it from this description. Heaven forbid that I should ever offer such encouragement to explanations as to give a clear one on any occasion myself! But I must write no more of this. . .
Jane Austen to Cassandra Queen's Square, Bath June 2, 1799
 If you had to choose only one fashion accessory with which to represent the entire Regency period, no doubt it would be the Bonnet. Large and small, close and wide, they came in an array of sizes and styles, each season bringing newideas and new requirements of what it was to be "Fashionable". Fashion magazines of the day seemed never to tire of describing this brim and that cockade, and the colors! Where Puce was once reigned supreme, Jonquil now led the way. Or so they would tell you. While wealthy socialites might spend their afternoons seriously pondering the style and purchase of a new bonnet, less fortunate young ladies might employ themselves with equal diligence to trimming and retrimming an older bonnet to meet the new style standards. For these young ladies, books like The Ladies' self instructor in millinery and mantua making, embroidery and appliqué, canvas-work, knitting, netting, and crochet-work, by R. L. Shep, would be invaluable. Careful perusing of its pages, along with those of La Belle Assemblée would offer all they would need to know to be found in the most current mode, even when "buried" in the country.
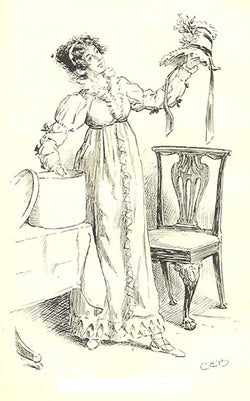
One such period book advises, "it is well to avoid the two extremes [of fashion] into which some people are apt to fall. The one is an entire disregard to the prevailing taste, and the other is a servile submission to its tyrannic sway. A medium course is the only sensible one, and, in this, good sense will dictate how far to go, and where to stop." As you can see from the following fashion plate and historic gown and bonnet, simple decorations were often the most tasteful and appropriate. The addition of simple trim (make your own or use grosgrain ribbon or bias tape) and lace along with a few ribbons can turn a plain bonnet into a lovely summer chapeau.

Of course, simplicity and moderation did not always rule the Regency, as a look at a few more period fashion plates and examples of the period Regency bonnet will show you! Both of these following fashion plates are from Costumes Parisiens, 1812.


These historic bonnets are from the Old Sturbridge Village Collection:

Styles of Regency Bonnet
The Elinor:

To trim the crown with fabric, use a long strip of fabric, an inch taller than your crown. Fold one long, raw edge under, and baste in place around the crown. Fold over the short edge to make a finished seam up the back and baste in place over the matching raw edge. Fold the remaining long edge over and run a gathering stitch along this line to pull the edges together. Tack in place. You might also wish to add a small square of matching fabric under the hole created by the gathered fabric, or sew a rosette over this spot. Pleating the fabric before basting it on gives a rounder look, which is lovely in sheer cottons.
To create the ruffled ribbon trim seen on the cream and green bonnet, run two lines of gathering stitches down the centre of a length of wide ribbon. Pull the threads to create a long gathered line. Tack in place and add an extra row of trim over the gathering stitches to hide them. In general, 3-4 yards of ribbon, a bunch of flowers and berries or fruit, and a few feathers will turn a plain bonnet into a thing of beauty.

The Eliza (A Poke Bonnet)
Trimming the Eliza is nothing but a joy. A few yards of ribbon wound around the crown creates a lovely period look. Take it a step farther by cutting an 18 inch circle from your favorite fabric. Run a gathering stitch around this and pull it tight to fit the crown of the bonnet. Tack in place. Wrap a length of ribbon around the crown to cover the raw edge and finish it off with ribbon bows and ties. 3-4 yards of ribbon will give you plenty with which to work.

The Cottage Bonnet
The Cottage bonnet is another adorable style of Regency bonnet. Trim it with simple ribbons and feathers or rosettes and ties.
Enjoyed this article? If you don't want to miss a beat when it comes to Jane Austen, make sure you are signed up to the Jane Austen newsletter for exclusive updates and discounts from our Online Gift Shop.
Read more

L'aimable Jane and the Jane Austen Silhouette
What is a silhouette and how do you make one? Find out how and also take a look at our gift collection featuring L'aimable Jane/ Jane Austen Silhoutte.
Read more
Host your own Jane Austen Festival - at home!
Not able to join us in Bath for the 2025 Jane Austen festival? Here's how you can experience the fun from home.
Read more
Leave a comment
This site is protected by hCaptcha and the hCaptcha Privacy Policy and Terms of Service apply.